Launching Vim From Visual Studio

Few days ago I noticed something cool over my coworker Gildas’ shoulder: he was lauching Vim straight from Visual Studio.
On Linux or Mac, I’m using Vim (customized to my preferences) + tmux + cgdb. When switching back to Visual Studio, I always miss the Vim experience badly.
That was until I started using @jaredpar’s VsVim Visual Studio Extension. VsVim reproduces Vim’s key binding experience inside Visual Studio. For a while, I’ve enjoyed being able to move the cursor with HJKL, use verbs, nouns and modifiers.
However, VsVim is “just” an emulation layer, not a full fledged Vim implementation. As such, it doesn’t understand plugins.
These days, I’m doing a lot of code refactoring and @tpope’s Subvert command (from his abolish plugin - screencast by @nelstrom) is a killer time saver. Just for that, I appreciate being able to launch Vim from within Visual Studio at the exact line and cursor I currently am. (of course the file must exist on the filesystem)
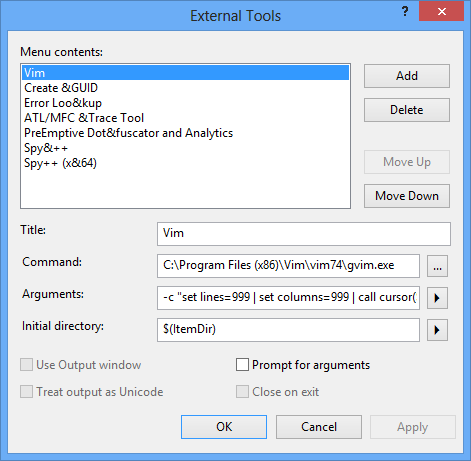
Here are the steps to configure Vim as an external tool in Visual Studio.
- Navigate to
Tools > External Toolsto add a new tool

Title: Vim
Command: C:\Program Files (x86)\Vim\vim74\gvim.exe
Arguments: -c "set lines=999 | set columns=999 | call cursor($(CurLine),$(CurCol))"
          $(ItemFileName)$(ItemExt)
Initial directory: $(ItemDir)
Then move the tool up to the first position. This step is required because a genius decided keyboard shortcuts are assigned by position in the list of external tool.
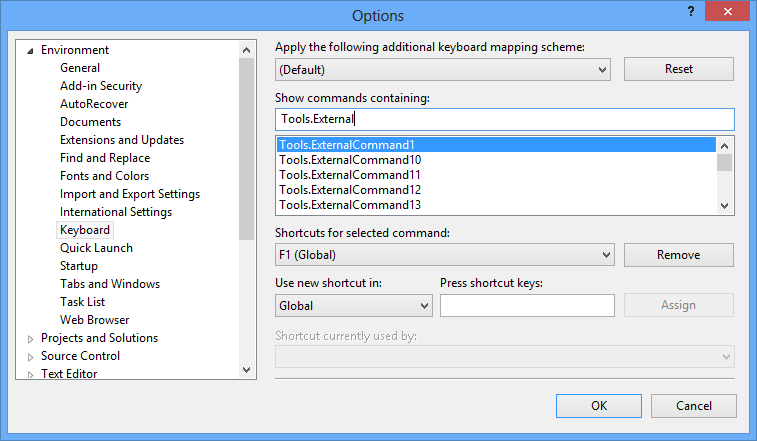
- Navigate to
Tools > Options > Environment > Keyboard

Show commands containing: Tools.ExternalCommand1
Use new shortcut in: Global
Press F1
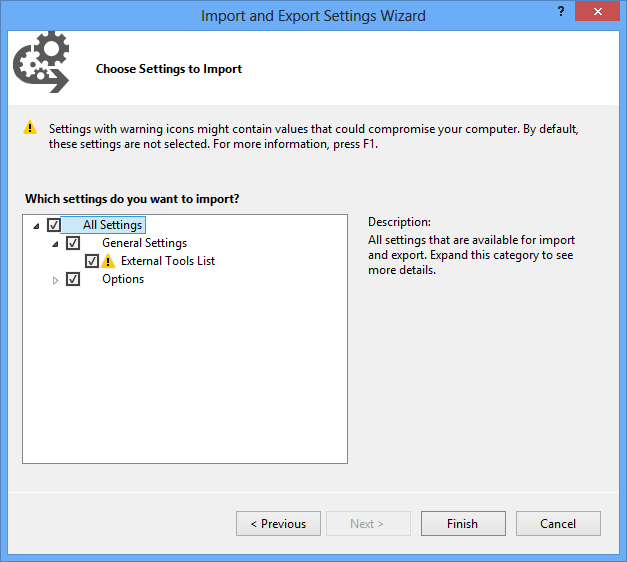
If you want something automated, you can download and import a prebuilt .vssettings file:

If you want, you can ommit “set lines=999 | set columns=999”. I use these two commands to put gVim in a “fake maximized” state. Otherwise the default window size is way too small.
Happy Visual Viming!